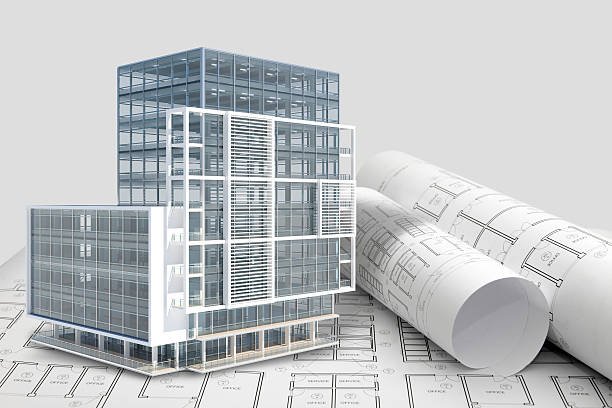
Photographing architectural models and renderings requires a different set of skills and techniques compared to photographing real buildings. The goal is to showcase the details, design, and craftsmanship of the models and bring digital renderings to life. Here’s a comprehensive guide on how to photograph architectural models and renderings effectively.
Understanding the Basics
1. Importance of Lighting
Proper Lighting:
Lighting is crucial in model photography. It highlights the details and textures of the model, making the design more understandable and visually appealing. Use both natural and artificial light to achieve the best results.
2. Choosing the Right Equipment
Camera:
A DSLR or mirrorless camera with manual controls is ideal for architectural model photography. These cameras provide the flexibility to adjust settings for optimal image quality.
Lenses:
Use macro lenses for close-up shots of intricate details and wide-angle lenses for capturing the entire model. Tilt-shift lenses can help in controlling perspective and avoiding distortion.
Techniques for Photographing Architectural Models

1. Setting Up the Scene
Clean Background:
Use a plain, uncluttered background to keep the focus on the model. A neutral color, such as white or black, works best. You can use a sweep backdrop to create a seamless look.
Stable Surface:
Place the model on a stable surface to avoid any movement during the shoot. A table with a non-reflective surface is ideal.
2. Lighting the Model
Soft Light:
Use soft, diffused lighting to avoid harsh shadows and highlights. Softboxes, diffusers, and light tents can help achieve even lighting.
Multiple Light Sources:
Consider using multiple light sources to illuminate the model evenly. Position lights at different angles to highlight various parts of the model and add depth.
3. Camera Settings
Manual Mode:
Shoot in manual mode to have full control over the exposure settings. Adjust the ISO, aperture, and shutter speed to achieve the desired effect.
Aperture:
Use a small aperture (high f-stop number) to ensure a large depth of field. This keeps the entire model in sharp focus, from the foreground to the background.
ISO:
Keep the ISO as low as possible to minimize noise and ensure clear, high-quality images.
Shutter Speed:
Use a tripod to stabilize your camera, allowing for longer shutter speeds without introducing blur. This is especially useful in low-light conditions.
4. Composition and Framing
Rule of Thirds:
Apply the rule of thirds to create balanced and visually appealing compositions. Position key elements of the model along the grid lines or at the intersections.
Leading Lines:
Use leading lines to guide the viewer’s eye through the image. This can be particularly effective in models with roads, paths, or architectural lines.
Perspective:
Experiment with different angles and perspectives to find the most compelling view of the model. Low angles can make the model appear more imposing, while high angles provide an overview.
5. Capturing Details
Close-Up Shots:
Use macro lenses or the macro setting on your camera to capture close-up shots of intricate details. Focus on textures, materials, and small design elements.
Contextual Shots:
Include contextual shots that show the model in relation to its surroundings or other parts of the design. This helps in conveying the overall concept and scale.
Photographing Architectural Renderings
1. Displaying Renderings
High-Resolution Screens:
Display renderings on high-resolution screens or print them on high-quality paper to ensure clarity and detail.
Lighting:
Ensure even and glare-free lighting when photographing renderings displayed on screens or printed materials. Use soft, diffused light to avoid reflections and shadows.
2. Camera Settings for Renderings
Manual Focus:
Use manual focus to ensure the rendering is sharp and clear. Autofocus can sometimes struggle with screens or glossy surfaces.
Aperture and ISO:
Similar to model photography, use a small aperture for a large depth of field and keep the ISO low to minimize noise.
White Balance:
Adjust the white balance to match the lighting conditions and ensure accurate color representation.
3. Composition for Renderings
Framing:
Frame the rendering tightly to eliminate any distractions from the surrounding environment. Focus on the key elements of the design.
Angles:
Experiment with different angles to avoid glare and reflections, especially when photographing renderings on screens or glossy prints.
Post-Processing Tips
1. Basic Adjustments
Exposure and Contrast:
Adjust exposure and contrast to enhance the details and make the image pop. Be careful not to overdo it, as this can lead to loss of detail.
White Balance:
Fine-tune the white balance to ensure accurate color representation. This is particularly important for renderings, where color accuracy is crucial.
2. Sharpening and Noise Reduction
Sharpening:
Apply sharpening to enhance the details of the model or rendering. Be subtle to avoid creating artifacts.
Noise Reduction:
Use noise reduction tools to minimize any noise, especially in images shot at higher ISO settings.
3. Correcting Distortions
Lens Corrections:
Apply lens correction profiles to fix any distortions, vignetting, or chromatic aberrations introduced by the lens.
Perspective Adjustments:
Use perspective correction tools to straighten lines and ensure the model or rendering is accurately represented.
Conclusion
Photographing architectural models and renderings requires attention to detail and a good understanding of lighting, composition, and camera settings. By following these techniques, you can capture stunning images that showcase the intricacy and beauty of architectural designs. Whether you are photographing physical models or digital renderings, these tips will help you achieve professional results that effectively communicate your architectural vision.

