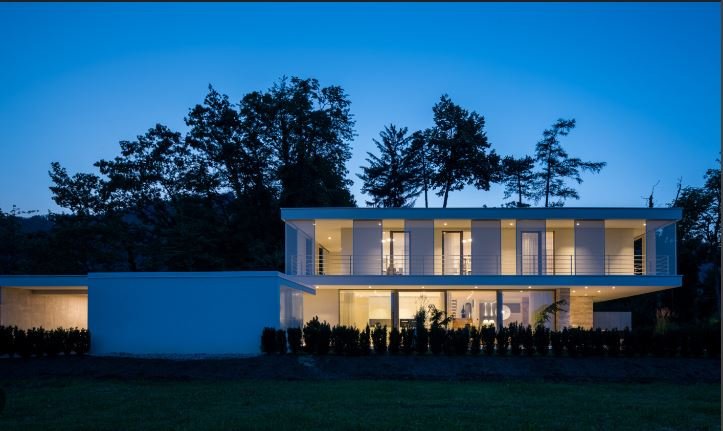
Post-processing architectural photos is an essential step in achieving stunning images that accurately represent the beauty and intricacies of buildings. This process involves using various editing techniques to enhance details, correct distortions, and create a polished final product. Here are some essential tips to help you elevate your architectural photography through effective post-processing.

Correcting Lens Distortion
Correcting lens distortion is crucial when editing architectural photos. Wide-angle lenses, commonly used in architectural photography, often introduce distortions that can make lines appear curved or skewed. Use software like Adobe Lightroom or Photoshop to correct these distortions, ensuring straight lines and accurate proportions.
Adjusting Perspective
Adjusting perspective helps maintain the structural integrity of the building in your photos. Perspective distortions occur when the camera is tilted up or down, causing vertical lines to converge. Utilize the perspective correction tools in your editing software to straighten these lines and create a more natural and visually pleasing image.
Balancing Exposure
Balancing exposure is key to highlighting the architectural details in your photos. Adjust the exposure to ensure the image is neither too dark nor too bright. Use the histogram to guide your adjustments, aiming for a balanced distribution of light and dark areas. This step enhances the visibility of intricate details and textures in the architecture.
Enhancing Colors
Enhancing colors adds vibrancy and life to your architectural photos. Adjust the saturation and vibrance settings to bring out the natural colors of the building materials and surroundings. Be cautious not to overdo it, as overly saturated images can look unnatural. Aim for a balanced, realistic representation of the scene.
Improving Contrast
Improving contrast helps make the architectural features stand out. Increase the contrast to create a more defined separation between light and dark areas. This adjustment adds depth and dimension to your photos, making the architecture appear more dynamic and engaging.
Sharpening Details
Sharpening details is essential for highlighting the fine textures and elements in your architectural photos. Use the sharpening tools in your editing software to enhance the clarity of the image. Focus on areas with intricate details, such as brickwork, window frames, and decorative elements, to bring out their sharpness and precision.
Correcting White Balance
Correcting white balance ensures that the colors in your photos accurately reflect the real-life scene. Adjust the white balance to remove any color casts caused by lighting conditions. This correction helps maintain the natural hues of the building materials and surroundings, resulting in a more authentic and visually appealing image.
Removing Unwanted Elements
Removing unwanted elements from your photos helps maintain a clean and professional look. Use the clone stamp or healing brush tools to eliminate distractions such as wires, poles, or people that detract from the architectural focus. This step ensures that the viewer’s attention remains on the building.
Enhancing Sky and Background
Enhancing the sky and background adds depth and context to your architectural photos. Adjust the exposure and contrast of the sky to make it more dramatic and visually appealing. Consider adding a subtle gradient filter to create a more balanced and harmonious background that complements the architecture.
Creating HDR Images
Creating HDR (High Dynamic Range) images can enhance the overall look of your architectural photos. HDR combines multiple exposures to capture a broader range of light and shadow details. This technique is particularly useful for scenes with high contrast, such as buildings with bright exteriors and dark interiors.
Using Layers and Masks
Using layers and masks allows for precise and controlled editing. Create adjustment layers for exposure, contrast, and color corrections, and use masks to apply these adjustments selectively. This technique helps you maintain the original quality of the image while making targeted enhancements.
Applying Filters and Effects
Applying filters and effects can add a creative touch to your architectural photos. Experiment with different filters to create various moods and atmospheres. Be mindful of the overall aesthetic and ensure that the effects enhance rather than overpower the architecture.
Adding Vignettes
Adding vignettes can draw the viewer’s attention to the center of the photo. Apply a subtle vignette effect to darken the edges of the image, creating a natural frame that highlights the architectural subject. This technique adds depth and focus to your photos.
Saving and Exporting
Saving and exporting your photos correctly ensures that they maintain their quality and are ready for display or print. Save your edited photos in a high-resolution format, such as TIFF or PNG, to preserve detail. When exporting for web use, choose appropriate settings to balance quality and file size.
Conclusion
Post-processing architectural photos is an art that requires attention to detail and a good understanding of editing techniques. By correcting distortions, balancing exposure, enhancing colors, and using various other adjustments, you can create stunning architectural images that capture the essence and beauty of the buildings. Mastering these post-processing tips will help you produce professional-quality photos that stand out in the field of architectural photography.

