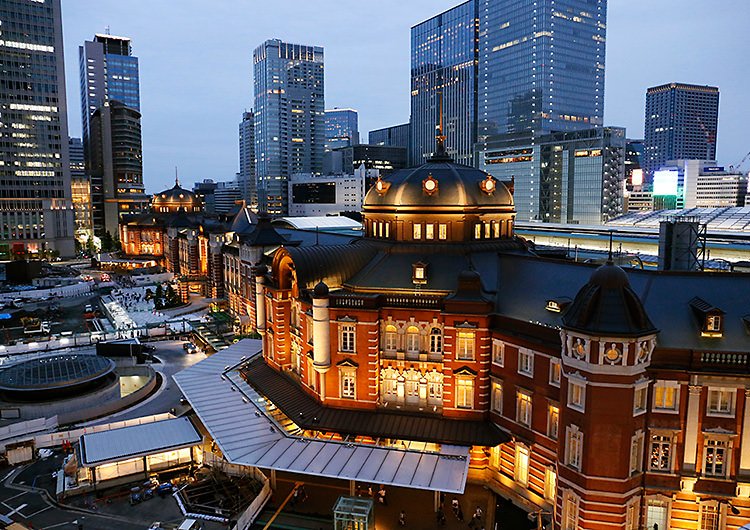
Nighttime architectural photography presents a unique opportunity to capture buildings in a dramatic and captivating way. The artificial lights illuminating the structures, the play of shadows, and the serene ambiance of the night can result in stunning images that showcase architectural beauty from a different perspective. Here’s a comprehensive guide on how to approach nighttime architectural photography to create breathtaking photos.
Preparation and Planning
Scout the Location
Visit During the Day:
Visit the location during the day to identify the best angles and compositions. This helps you plan your shots and understand how the building is illuminated at night.
Check Lighting:
Observe the artificial lighting on the building and surrounding areas. Note how the lights highlight architectural features and create interesting shadows.
Essential Equipment

Camera:
A DSLR or mirrorless camera with manual controls is ideal for nighttime photography. These cameras allow you to adjust settings for optimal exposure and image quality.
Tripod:
A sturdy tripod is essential for nighttime photography to keep the camera stable during long exposures. This helps in capturing sharp and clear images.
Remote Shutter Release:
A remote shutter release or a timer reduces camera shake when taking long exposure shots, ensuring sharper images.
Lenses:
Wide-angle lenses are great for capturing the entire structure, while prime lenses with wide apertures (e.g., f/1.8, f/2.8) are useful for low-light conditions.
Camera Settings
Manual Mode
Control Exposure:
Shoot in manual mode to have full control over the exposure settings. This allows you to adjust the aperture, shutter speed, and ISO to achieve the desired effect.
Aperture
Depth of Field:
Use a small aperture (high f-stop number) like f/8 or f/11 to ensure a large depth of field, keeping the entire building in focus. For creative effects or to focus on specific details, use a wider aperture.
Shutter Speed
Long Exposures:
Use long shutter speeds to capture more light and create bright, well-exposed images. Shutter speeds can range from a few seconds to several minutes, depending on the lighting conditions and desired effect.
ISO
Minimize Noise:
Keep the ISO as low as possible to minimize noise and ensure clear, high-quality images. Start with ISO 100 or 200 and adjust as necessary.
Composition and Framing
Use Leading Lines
Guide the Viewer’s Eye:
Use leading lines to draw the viewer’s eye towards the main subject or through the image. Streets, pathways, and architectural lines can serve as effective leading lines.
Frame the Subject
Enhance the Composition:
Use natural or man-made elements to frame the building and enhance the composition. This adds depth and context to your photos.
Play with Reflections
Add Interest:
Look for reflections in water, glass, or other surfaces to add an interesting and dynamic element to your photos. Reflections can create symmetry and enhance the visual appeal.
Lighting and Exposure Techniques
Balance Artificial Light
Combine Light Sources:
Balance the artificial light from street lamps, building lights, and ambient light to achieve a well-exposed image. Use a combination of long exposures and adjusting aperture to control the light balance.
Light Painting
Creative Lighting:
Use light painting techniques to add creative lighting effects to your photos. This involves using a flashlight or other light sources to illuminate specific parts of the building during a long exposure.
HDR Photography
High Dynamic Range:
Consider using HDR (High Dynamic Range) techniques to capture a wider range of light and detail. Take multiple exposures at different settings and merge them in post-processing to create a well-balanced image.
Post-Processing Tips
Basic Adjustments
Exposure and Contrast:
Adjust the exposure and contrast to enhance the details and make the image pop. Be careful not to overdo it, as this can lead to loss of detail.
Noise Reduction
Minimize Noise:
Use noise reduction tools to minimize any noise, especially in images shot at higher ISO settings. This helps in maintaining a clean and sharp image.
Color Correction
Accurate Colors:
Adjust the white balance to ensure accurate color representation. Nighttime lighting can often cast a color tint, so fine-tuning the colors can improve the overall look.
Sharpening and Clarity
Enhance Details:
Apply sharpening and clarity adjustments to enhance the details and textures of the building. Be subtle to avoid creating artifacts.
Conclusion
Nighttime architectural photography offers a unique and rewarding challenge, allowing you to capture buildings in a new light—literally. By understanding the influence of artificial lighting, using the right equipment and settings, and applying creative composition techniques, you can create stunning images that showcase the beauty and drama of architecture at night. Experiment with different approaches and let your creativity shine to produce captivating nighttime photos.

